I have written a post regarding outdoor shooting…the response was tremendous! So, I wanted to write one for inside shots too. Plus, I know a lot of mom’togs who are the picture of calm while taking outdoors portraits… but try to capture kamikaze toddlers indoors and um, yeah…not so much. In fact, there are a few I know who have described it to me as “the bane of my existence.” And please don’t forget, I offer private lessons and mentoring for both mom’togs and pro photographers. I will get you off auto and using your camera creatively in no time!
OK, let’s tally up an indoor photo’s potential transgressions, shall we? Low light (or ugly fluorescent light), color casts from walls or lighting, potentially distracting backgrounds, bright & bleached out subjects from improper use of flash, subjects that are underexposed, ugh the list can go on and on. Since you have to walk before you can run, I am to make this post more on technique and save the indoor posing ideas for another blog. Alrighty, let’s see if we can’t turn your indoor picture-taking frown upside down.
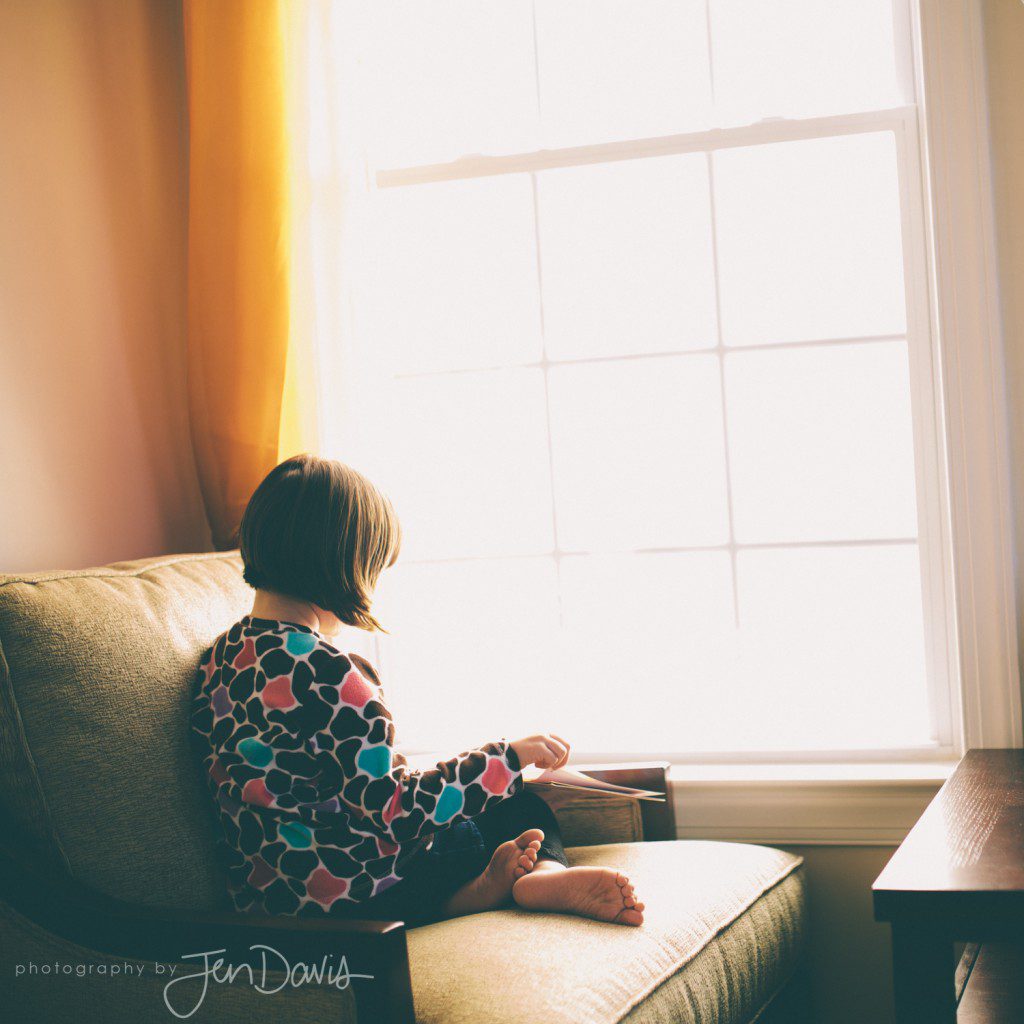
#1. Light. We begin this list much like the last one for outdoor images, with light. And I will reiterate again that lighting can make all the difference. {I am assuming for this discussion that you aren’t using a studio set up with Alien Bees or the like and you are relying solely on what is available to you.} Get into the light. Find spots in your house at various points in the day that have the best light. Some good ones? The front door or the sliding glass door. Most master bedrooms are not created for vampires so they typically have some of the best lighting. Windows are your friend, particularly north and south facing ones. Make like a Girl Scout and discover your windows. Any window can be used depending on the time of day. For instance, an east-facing window will be flooded with direct sunlight early in the morning, however, that same window in the afternoon will have a much softer type of light. And try, really really try, to not mix your light sources. You know what I mean. Don’t be one of those people who open the blinds and turn on every single light in the room. This makes it next to impossible to correct for white balance. And I will be forced to confiscate your mom’tog card.

#2. White Balance. Correct for it. Or use a grey card. Don’t trust that your camera is smarter than you. If you use Auto White Balance and the image of your daughter looks yellow under the lights, unless she has a severe case of jaundice something is wrong. If you shoot in RAW, you get some breathing room because the white balance can be better corrected in post processing…lucky you!
#3. Don’t be afraid to raise your ISO. Getting a good exposure indoors usually means having to increase your ISO. Try playing around with your camera to see how high you can go before the grain and noise become unacceptable. Newer cameras will outperform every time here. If you plan on doing a lot of indoors or lifestyle shooting, think about an equipment upgrade if you are finding that you can’t go above 600-800 ISO without seeing lots of noise. Don’t just under-expose because you are afraid to keep increasing your ISO. Lightening an underexposed photo will only accentuate the noise. For this reason, I would much rather my photo was slightly overexposed.
#4. Get wide open. OK, first off, make sure you are shooting in manual so you have lots of control over your settings. Then, open her up! A larger aperture (smaller f number) will allow more light into your camera’s sensor. More light means better exposure. If you can open up your f stop more, you can have a lower ISO.
#5. Flash is your friend, most of the time. You really need to know how to manipulate flash to make it flattering indoors. If you only have on-camera flash, it’s pretty impossible to create pleasing light. I mean, you would have to be Houdini. If you must, I would always put a tissue over it to diffuse it somewhat. Unless of course you are going for the bleached out subject in front of a very dark background look. A better flash situation is to use an off camera flash and angle the head to bounce it off a neutral wall, ceiling or window to create some supplemental natural lighting that works. I try not to use flash, but it is inevitable sometimes. Like, when I am trying to chase my two year old around, and a slower shutter speed or tripod (HA HA HA) isn’t an option.
#6. Position. While practicing these tips, I want to give you a posing suggestion. Position your subject facing the ambient light source {window}. Then, shoot them backlit with a window. Two totally different looks!